Six easy steps to construct a strong waterproof concrete roof
Constructing a robust concrete roof can seem tedious because even though concrete is a superior material for building the foundation of both housings and commercial structures, it does not mean that it will not suffer any damage in the future. Adding the best cement for the roof is a great way to protect your building, and waterproofing is one of the methods that can help avoid damage. Here are six easy steps to help you construct a solid waterproof concrete roof:

1. Choose the right concrete mix.
The first step is to select the right concrete mix for building a strong waterproof concrete roof. A mix that is too weak or porous will not be able to withstand the weight of the roof and will easily crack and leak. On the other hand, a mix that is too strong or dense will be too heavy and may cause the roof to collapse. An excellent concrete mix for a roof should have a compressive strength of at least 3,000 psi and a water-to-cement ratio of 0.45 or less.
2. Prepare the surface
Before pouring the concrete, the surface on which the roof will be constructed must be prepared appropriately. It includes removing obstacles, levelling the surface, and creating a slope to allow proper drainage. It is also important to ensure that the surface is free of any cracks or holes that could allow water to seep through.
3. Apply a Waterproofing Membrane
A waterproofing membrane is a crucial step in constructing a waterproof concrete roof. This membrane is applied to the surface before pouring the concrete and serves as an additional layer of protection against water damage. Various waterproofing membrane options are available, including rubberized asphalt, polyurethane, and polyvinyl chloride. It is important to choose a membrane appropriate for the type of roof you are constructing and the climate in which it will be located.
4. Place Reinforcing Bars
Reinforcing bars, or rebar, are essential to a strong concrete roof. They provide additional support and prevent cracking by evenly distributing the roof's weight. The rebar should be placed in a grid pattern, with the bars running horizontally and vertically. It is also important to ensure that the rebar is properly secured to prevent movement during the pouring process.
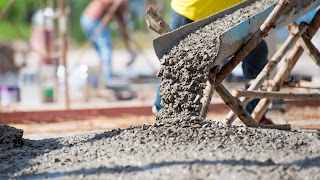
5. Pour and Finish the Concrete
Once the surface is prepared and the waterproofing membrane and rebar are in place, it is time to pour the portland concrete. It is important to pour the concrete into small sections so it can be properly consolidated and finished. The concrete should be poured at least 4 inches thick and finished with a float or trowel to create a smooth surface.
6. Cure the Concrete
Curing is an essential step in the concrete-making process. It is the process of keeping the concrete moist for a specific time period to allow it to harden and gain strength. The curing process should last at least 7 days, during which time the concrete should be covered with plastic or damp burlap to keep it moist. Once the curing process is complete, the concrete roof should be allowed to dry for an additional 7 days before it is ready to be used.
In conclusion, building a strong and waterproof concrete roof is an important process that requires proper planning and execution. By following these six steps, you can ensure that your concrete roof will be durable and resistant to water damage. It is important to remember to choose the right cement brand, like Wonder Cement, concrete mix, prepare the surface, apply a waterproofing membrane, place reinforcing bars, pour and finish the concrete, and cure the concrete properly. With these steps, you can feel secure that your roof will last for years.


Comments
Post a Comment